If you have suspended ceilings made of GKL of the material in your house, then often you need a cornice made of drywall. It must be mounted according to a certain method. More interesting things on Фугу Казино.
What is the advantage of ceilings and cornices from drywall?
Video on installing a two -section curtain cornice
Before talking about the installation method, let’s analyze why GKL is chosen to create ceilings and cornices? Drywall is quite light material. It’s just to make one thing from it – and multi -level ceilings, as well as beautiful cornices. You just need to equip the frame. In this case, the entire structure will have a small weight. In addition, drywall – environmentally friendly material. It is made without synthetic additives. During operation, no toxic components are formed that harm human health. Moreover, the acidity of the gypsum is very close to the parameters of the acidity of the human skin.
Drywall allows you to create ceilings of various shapes and for any design of the room (from avant -garde to classics). This material has fire resistance and excellent soundproofing ability. Absorbs excessive noises emanating from neighbors. GCL Sheets have a low cost, and their installation costs two times cheaper than installing a hinged ceiling. And the material itself is more practical and durable. The surface of the drywall has a smooth texture. Therefore, ceilings most often do not need to be aligned additionally. It is only important to close the joints between the sheets with putty.
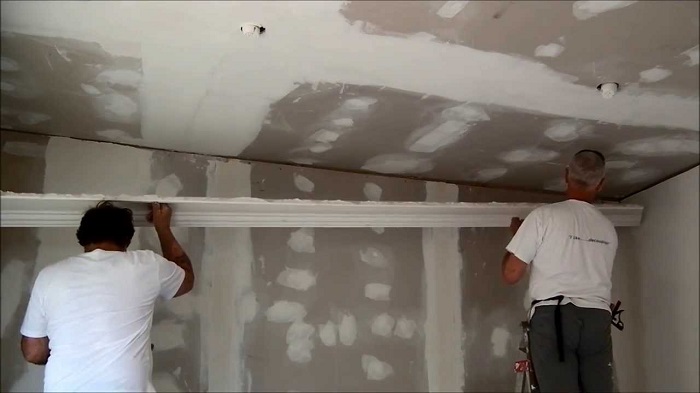
How to make drywall cornice and what is necessary for this?
Video lesson on installing a plastic cornice in drywall
Gypsum cardboard curtains are not only a convenient and functional thing, but also an element of decor. It is desirable to mount it immediately after installing the ceiling. For work, you will need some materials:
Metal profile;
dowels;
drywall;
self -tapping screws;
The paint is water -based.
In some cases, when you want to make cornices with illumination, you will also need LEDs. At the initial stage, the surface is prepared. If there was an old coating, then it is eliminated. In the same case, when it was not, they simply apply a primer to the base. Further, the height of the cornice is noted from the ceiling downward. Most often this distance is 14-16 centimeters. At the next stage, the frame begins to install.
First make marks on the walls and ceiling. Choose the width of the cornice (usually do 30-40 cm). Further along the marked lines, a metal profile is attached using dowels. The guide profile is attached to it with self -tapping. After that, the frame can be considered completed. If you are going to make a cornice with lighting, it is important to bring a cable for LEDs. Then sheathe the frame with drywall sheets. Fasten the KGL with screws that are important to drown a little into the material. Thus, hats will not perform. At the last stage, put their putty so that there is no place of joints and hats from the screws. Plastic or metal corners are applied to the corners. They are also covered with putty on top of them. Drywall is painted in any color you like.
It is better to use a water -based paint for these works (as the most environmentally friendly). Apply it with a brush or roller.
How to fix ordinary cornices to drywall?
If you already have a regular cornice, which must be attached to a drywall surface, then first attach it to the alleged place of fastening. And determine – it will be mounted on the wall adjacent to the window, ceiling, or between 2 walls? Next, mark about 10 cm above the window. If the cornice is supposed to be attached to the wall, then make marks on it. Then fix the brackets. Next, fix the cornice on them. If the weight of the cornice exceeds 7 kilograms, then it is important to install brackets on the wall in the place where there is a frame profile (it can be determined by a magnet).
Maybe you will have to mount the cornice using a metal profile. In the case when the cornice is planned to be mounted between the walls, it is necessary to make marks (places of fastening) on them. To begin with, the distance on which the future cornice will be located are measured down from the ceiling. Then the brackets are fixed there. Well, then insert a barbell into them. When attaching the cornice on the ceiling, the principle is the same. Celebrate fixations there. Insert the brackets that should be symmetrical to the window. Then the cornice is attached. If the brackets are not symmetrical, then the curtains will look bad. The attachment process can be considered completed on this.