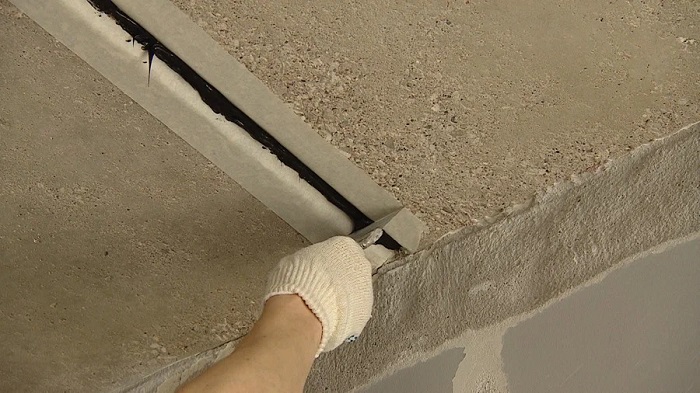
Sealing joints is an important part of renovation work, especially when it comes to restoring the strength and aesthetic appearance of walls and facades. Proper execution of this procedure helps maintain the durability of the structure and improve the appearance of the room, as well as prevent future cracks and damage. Before beginning work, it is important to familiarize yourself with the basic rules and use high-quality materials to achieve the best results. To ensure the most comfortable renovation conditions and avoid unnecessary costs, you can order a repair on https://asapreno.ca/, choosing the optimal solutions for your needs.
Determining the Type of Joint for Correct Treatment
Before beginning jointing, it is important to correctly determine the type of joint to select the most effective methods and materials. Incorrect selection of the type of joint can lead to rapid deterioration of the joints and a decrease in the overall aesthetic appearance of the facade or cladding.
To do this, carefully consider the characteristics of the surface to which the joint will be applied. There are several types of rustication, depending on their degree of permeability, texture and the material from which they are made. Proper identification can ensure the durability and reliability of the work performed.
Classification of Rustication by Type and Character
- Smooth Rustication: is characterized by a uniform surface without a pronounced texture; it is usually used for decorative purposes and requires careful filling of cracks and defects.
- Textured Rustication: can have a variety of textures, such as roughness or protruding elements; maintaining surface characteristics is important when filling.
- Stone Rustication: are made of artificial or natural stone and require a special approach depending on the porosity and type of stone.
Definition of Rustication Materials
When choosing the type of rustication, it is important to consider the material from which it is made: concrete, brick, stone, or gypsum. Each type has its own characteristics in terms of porosity, structure, and adhesion to sealing compounds.
This type is determined by visual inspection and, if necessary, simple tests such as porosity or water resistance. This approach helps select the right materials and tools for joint filling and improve the quality of the work performed.
Surface Preparation Before Filling
After cleaning, it is recommended to inspect the surface condition to identify cracks, chips, or other defects that require repair before filling. The surface must be dry, strong, and free of particles that could reduce adhesion. If necessary, pre-filling or priming is recommended to improve adhesion and surface uniformity.
Choosing Suitable Materials for Repairing Defects
When filling joints, it is important to carefully select materials to ensure the durability and quality of the work performed. It is necessary to consider the type of wall surfaces, the extent of damage, and the expected operating loads.
The main criterion when selecting materials is their compatibility with the existing structure. Cracks and defects are typically repaired using cement mixtures, gypsum mortars, or special repair compounds. In wet areas, it is preferable to use waterproofing compounds or water-resistant mixtures, which provide additional protection against moisture and prevent the development of mold.
Recommended Materials for Sealing Joints
- Cement Mortars: Suitable for large cracks and structural defects, provide strength and durability.
- Gypsum Mixes: Ideal for fine sealing, small cracks, and decorative work, they cover the surface with an even layer.
- Epoxy Compounds: Used to seal cracks under high load conditions or when structural restoration is necessary.
- Polymer Resins: Used to seal minor defects, have good adhesion and moisture resistance.
Techniques for Cleaning and Removing Old Mortar
Successful cleaning requires considering the condition of the old mortar, its strength, and the type of surface. Using the right tools and methods can significantly simplify the process and achieve excellent results.
Key Steps and Recommendations for Cleaning
- Tool Preparation: Use a trowel, chisel, hammer, and wire brush or a stiff wire brush to remove old mortar.
- Removing Large Mortar: Carefully knock out excess and loose material, avoiding damage to the substrate.
- Cleaning Residue: Use mechanical methods such as sanding and cleaning and a brush to remove residual particles and dirt.
- Surface degreasing: Treat the surface with specialized products or a solution of water and soap to remove dust and grease stains.
- If necessary, professional products: For heavily aged or durable layers, use chemical compounds to dissolve the old mortar, following the manufacturer’s instructions.
Proper cleaning and removal techniques are the key to successful joint repair. Using the right tools and methods, you can prepare the surface for the new layer, ensuring its reliability and durability. Careful completion of each step and adherence to the rules will help achieve excellent results and extend the life of the repair.