Install plumbing equipment is not too difficult for a long time. When the bath is chosen and mounted, the queue of the following task comes:. Shells and baths will retain their grace and elegance only if it is completed with good auxiliary equipment. The same siphons, for example, although they are invisible, but comfort in general depends on their functions. Let’s talk about the installation of a siphon.
The appointment of a siphon
By means of a siphon, the bath is connected to the sewage. So, he faces a double task: not only to ensure drain-overflowing, but also to prevent the access of bad odors into the room. Therefore, the quality of materials and the professionalism of the installation are so important. Do not be alarmed, it is not so difficult to put a siphon, the main thing is to choose it right.
There are three main types of siphons: automatic, simple (with a cork) and semi -automatic. The cork classic is familiar to everyone, relatively cheap, simple and reliable. Who does not remember the plump of the hole in the plug with the chain. The semiautomatic device is distinguished by perfection. The cover is controlled through the cable, depending on its rotation, the lower drain opens or closes. Automatic siphon is most complex. It has very developed functionality. For example, the traffic jam is more reliable than an ordinary cable; The water pressure can be changed with a critical filling of the bath. The complexity of drain devices is inversely proportional to reliability. To reduce the risk, when buying a semiautomatic device and even more so automatic siphon should not save. Better then, if finances do not allow, to purchase the easiest option. As for the materials, there is a plastic outside of competition.
Before you start installing a siphon, check three important nuances:
freedom of access to pipes for the purpose of cleaning or dismantling;
The height difference is a centimeter per meter between the draining pipe and the place of contact with the sewer;
A pipe for a siphon should not be five centimeters already.
Instructions for the assembly method
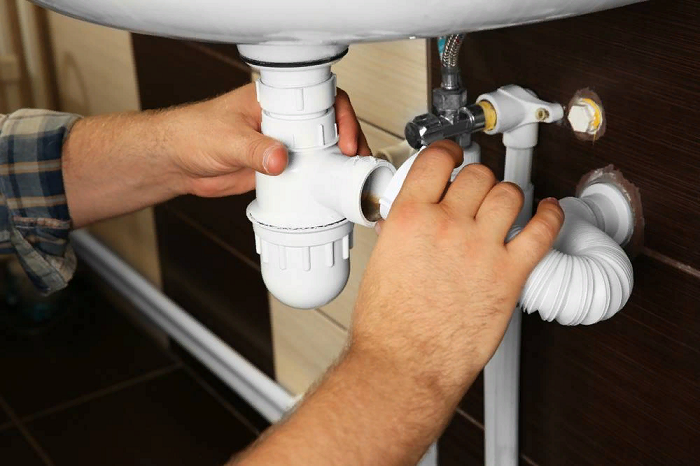
Plastic parts are twisted with hands, without tools. Follow the sealing gaskets especially carefully. If they are installed incorrectly, then at the junction of the parts there will be a constant leak. Therefore, before taking up work, set up manipulations with the gaskets themselves and the university nuts. The cone -shaped gasket is certainly placed by a sharp edge in the direction opposite to the nut. Part of the cone must go inside the other segment of the structure so that sealing is the most thorough.
What will happen if the cone “looks” in the opposite direction? Of course, tightness will be in question. The engineers, however, provided for the possibility of such an error and came up with protection from a fool – the need for excessive effort. Когда всё делается по схеме, ни натягивать детали, ни тем более пыхтеть от натуги не приходится.
The lower overflow is connected to the bath first. Sometimes it is also called a drain neck. This neck is formed by two overlays. Both of them need to be treated well with silicone. The one that looks like a chrome cup must be applied to the plum of the bath from the inside; Another – below the bath. Holding them together, scroll the screw from top to bottom. Do it confidently, but without unnecessary efforts that can break plastic. The upper overflow is collected in the same way. When everything is ready, a hose is placed between the overflow and the drain. Excessive length is eliminated not by cutting, but by bending this hose.
Now you can attach a siphon to the drain neck. Check thoroughly whether the connection is dense!
Further, a corrugated tube or a hard pipe is attached to the water shutter, which connect them with sewer pipes. It occasionally required not a tube, but a cuff. Everything, on this assembly work is completed.
Be sure to immediately test everything. Fill the bath at least half, and even better – by three quarters so that the pressure is close to the usual. Make sure that with a plug closed from the lower overflow there is no leak. Most often it is eliminated by pulling the nut. But sometimes it may be necessary to dismantle everything and do it again. Lower drain flow means that the siphon elements are stretched too weakly. Their connection must be strengthened.
The assembly and installation of semi -automatic siphons of large differences from the just described scheme do not have. However, if the cork is controlled through the cable, then in the upper half of the neck instead of the screw, a chrome glass is used, screwing into the lower part. In any case, remember that the plastic elements are connected by the hands (without tools), and this does not require excessive effort, if only everything is done correctly.









Leave a Reply